60 traditional recess games, indoor recess activities and brain breaks for grades K to 8, sorted by where you’ll play them. Filter by grade, space, time and energy. Every game lists setup, rules, safety notes, ways to include students with disabilities and teacher tips, and prints as a game card. Plus printable indoor recess lists by grade band and a set of brain break dice.
- No ads
- No sign-up or email
- Free to print and copy for your school
Game finder
Pick what you know about your class and your space. Every filter is optional, and the results update as you go.
No games match all of those filters. Try removing one.
Tag and chasing games 8 games
Running games for a field or a big blacktop. Set the boundaries well away from fences, walls and play equipment, and teach the tag before you teach the game: one hand, two fingers, below the shoulders.
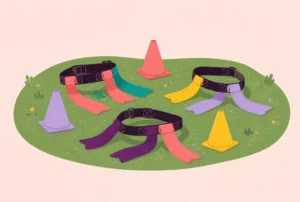
Freeze Tag
Also called: Stuck in the Mud
Taggers freeze anyone they touch; free players unfreeze them by crawling through their legs or giving a high five.
How to play
You need
Cones for boundaries, pinnies or a soft object for taggers.
Setup
Mark a square play area with cones, at least 15 feet from any wall or fence. Pick one tagger for every eight players and give each a pinnie so everyone can see who’s chasing.
How to play
- On “go,” taggers chase everyone else inside the boundaries.
- A tagged player freezes on the spot with their feet apart and arms out.
- A free player can unfreeze a frozen player with a high five, or by crawling between their feet if the group likes that version.
- Swap taggers every two minutes, whether or not anyone is frozen.
- Play several short rounds rather than one long one.
Safety notes
- Tags are one hand, two fingers, below the shoulders.
- Anyone running out of bounds to escape is frozen; it keeps players away from the fence line.
Include everyone
- Wheelchair users: unfreeze with a high five instead of crawling through; frozen chair users hold one arm up so others can spot them.
- Limited stamina: make a frozen player’s job count as playing, and swap taggers often so nobody chases for long.
- Deaf or hard of hearing: start and stop rounds with a raised arm or a flag drop as well as the call.
Teacher tips
- If every player is frozen within a minute, you have too many taggers. If nobody is frozen after two, add one.
- Hand pinnies to the next taggers before the round ends so the swap takes five seconds.
Variations
- Frozen players hold a pose of their choice (a statue, a letter of the alphabet), and the unfreezer has to copy it before both run off.
Tunnel Tag
Also called: Bridge Tag
A freeze tag variation where tagged players stand with legs wide as a tunnel until a free player crawls through.
How to play
You need
Cones for boundaries, pinnies for taggers.
Setup
Mark the play area on grass or a gym floor; crawling on blacktop scrapes knees. Pick two or three taggers.
How to play
- Taggers chase the rest of the group.
- When tagged, a player stands still with feet wide apart, making a tunnel.
- A free player crawls through the tunnel from front to back to set them free.
- While a player is crawling through a tunnel, neither of them can be tagged.
- Change taggers every two or three minutes.
Safety notes
- Play on grass or mats only.
- Tags stay below the shoulders, and taggers may not tag someone halfway through a tunnel.
Include everyone
- Wheelchair users: a frozen chair user raises both arms and is freed when a player circles their chair once.
- Sensory: allow a frozen player to choose a high-five release instead of having someone crawl close to them.
- Limited stamina: rescue is a rest, so let players with low stamina be rescuers who walk rather than run.
Teacher tips
- Kids sometimes camp near a tunnel waiting to rescue it. A rule that rescuers must keep moving keeps the game flowing.
- Count tunnels out loud at the end of a round; it gives taggers a score without anyone being out.
Shadow Tag
On a sunny day the tagger steps on another player’s shadow instead of touching them.
How to play
Setup
Pick a sunny time of day; it works best in the morning or mid-afternoon, when shadows are long. Mark open boundaries away from buildings that throw big shade patches.
How to play
- The tagger chases the group and tries to step on someone’s shadow.
- A player whose shadow gets stepped on becomes the new tagger.
- Shade from a tree or building is base, but only for a count of five.
- After a few rounds, add a second tagger.
Safety notes
- Nobody touches anyone, so it’s a good tag game for grades still learning gentle tags.
- Watch heads-down running: shadow chasers look at the ground, so keep the area clear of poles and benches.
Include everyone
- Wheelchair users: chair users’ shadows count just the same, and they can tag by rolling onto a shadow.
- Low vision: pair with a buddy who calls out “shadow left” or “shadow right,” or play in a smaller area.
- Limited stamina: shrink the play area so short bursts are enough.
Teacher tips
- Explain the physics before you play: why is your shadow longer now than at noon? It turns recess into a science preview.
- On a cloudy day, switch to Freeze Tag.
Flag Tag
Also called: Catch the Tail, Tail Tag
Everyone wears a tail tucked at the waist; players try to pull other tails while keeping their own.
How to play
You need
One flag belt, scarf or strip of cloth per player.
Setup
Each player tucks a strip of cloth into the back of their waistband with most of it hanging out, or wears a flag belt. Set boundaries well inside any fence.
How to play
- On “go,” everyone tries to pull tails from other players while protecting their own.
- You can’t hold your own tail or tuck it in tighter.
- When you lose your tail, go to the edge, take a spare tail from the bin and come straight back in.
- Each pulled tail is a point. Drop pulled tails in the bin as you collect spares.
- Play two-minute rounds and count points at the end.
Safety notes
- Pull the tail only. No grabbing shirts, arms or waistbands.
- Tails go at the waist, never around the neck or tied to a belt loop.
Include everyone
- Wheelchair users: tuck the tail at the side of the seat or on the back of the chair where hands can reach it but wheels can’t catch it.
- Low vision: use bright tails and a smaller area, or play in pairs with one partner guiding by voice.
- Sensory: a player who doesn’t want others close can be the tail keeper, handing out spares and counting points.
Teacher tips
- A spare-tail bin means nobody sits out, which keeps arguments short.
- Flag-football belts from the PE closet make this faster to set up than cloth strips.
Variations
- Teams: two tail colors; each team pulls only the other color.
Dragon's Tail
Also called: Catch My Tail, Snake Tail
Teams of five or six form a dragon by holding shoulders; the head tries to catch the tail of its own body without the line breaking.
How to play
You need
One scarf or cloth strip per dragon.
Setup
Count off groups of five or six. Each group lines up holding the shoulders or waist of the player in front. The last player tucks a scarf into their waistband as the tail.
How to play
- On “go,” the head of the dragon tries to grab its own tail.
- The rest of the body tries to keep the tail away, without letting go.
- If the body breaks apart, the dragon stops and reconnects before moving again.
- When the head catches the tail, the head moves to the back and becomes the new tail.
- Play until everyone has had a turn at the front.
Safety notes
- Hands rest on shoulders or waist; no pulling on clothing.
- Keep dragons at least 15 feet apart, since the tail swings wide.
Include everyone
- Wheelchair users: a chair user can be the head and chase; the body walks rather than runs.
- Sensory: a student who doesn’t want to be touched can be a referee who calls “reconnect” when a dragon breaks.
- Limited stamina: make dragons of four, and play one-minute rounds.
Teacher tips
- Start slow. A dragon that whips too fast throws the tail off its feet.
- Older grades can try two dragons chasing each other’s tails, but only on grass.
Sharks and Minnows
Also called: Fishy Fishy Cross My Ocean
Minnows run from one end line to the other while sharks in the middle tag them; tagged minnows become seaweed who help.
How to play
You need
Cones for two end lines and sidelines.
Setup
Mark two end lines about 60 feet apart, with sidelines, and keep both ends at least 15 feet from any wall or fence. Pick two sharks; everyone else starts on one end line as minnows.
How to play
- The sharks call “Fishy, fishy, cross my ocean.”
- All minnows run for the far end line. Sharks tag as many as they can.
- A tagged minnow becomes seaweed: they stand still where they were tagged and can tag minnows who pass within arm’s reach.
- On the next call, minnows run back the other way.
- When only a few minnows are left, those minnows become the next sharks and everyone else returns to the end line.
Safety notes
- One hand, two fingers, below the shoulders.
- End lines are cones on open ground, never a wall; players need room to slow down.
Include everyone
- Wheelchair users: chair users can be seaweed or sharks who tag with a pool noodle tap.
- Low vision: give each minnow run a sound cue, and let a partner run alongside holding a short rope loop.
- Limited stamina: let any minnow choose to become seaweed at the start of a round.
Teacher tips
- Seaweed keeps tagged players in the game, so nobody sits on the side for long.
- If the same fast runners always survive, add a rule that the last three minnows become sharks automatically.
Everybody's It
Also called: Everyone Is It
Every player is a tagger at once; when you’re tagged you do a quick task at the edge and come straight back.
How to play
You need
Cones for boundaries.
Setup
Mark a medium-sized area. The more players you have, the bigger it can be.
How to play
- On “go,” everyone tries to tag everyone else.
- If you’re tagged, jog to the edge, do five jumping jacks and come back in.
- If two players tag each other at the same moment, both do the task.
- Play one or two minutes per round, and change the task each round.
Safety notes
- Tags are one hand, two fingers, below the shoulders.
- With a big group, shrink the speed: walking-only rounds keep collisions down.
Include everyone
- Wheelchair users: chair users can tag and be tagged by touching the armrest; the edge task can be arm circles.
- Limited stamina: walking rounds count, and the edge task can be a rest.
- Deaf or hard of hearing: post the edge task on a card at each cone.
Teacher tips
- It’s a quick warm-up that needs zero explaining once kids know how to tag.
- Use the edge task to practice something: spell a word, count by fives, name a state.
Blob Tag
Also called: Chain Tag
The tagger links arms with each player they catch, growing into a blob that splits in two when it reaches four.
How to play
You need
Cones for boundaries.
Setup
Mark a large area away from walls. Pick two players to start as a blob, holding hands.
How to play
- The blob chases the group, keeping hands joined.
- Only the free hands at each end of the blob can tag.
- A tagged player joins the blob by holding hands with whoever tagged them.
- When the blob reaches four people, it splits into two blobs of two.
- The last free player starts the next blob with a partner of their choice.
Safety notes
- The blob moves at a jog; if it breaks apart, it stops and reconnects.
- No clotheslining: the free players may not run under joined hands.
Include everyone
- Wheelchair users: a chair user can be a blob end, with partners holding the chair’s side or a short rope instead of a hand.
- Sensory: players who don’t want to hold hands can each hold one end of a short scarf.
- Limited stamina: blobs walk; free players speed-walk too.
Teacher tips
- Splitting at four keeps blobs fast enough to be fun and small enough to steer.
- Remind the blob to talk; it can only go one direction at a time.
Blacktop and court games 8 games
The games painted lines were made for: four square, hopscotch, wall ball, jump rope and the tetherball pole. Most run themselves once kids know the rules, so post the rules near the court.
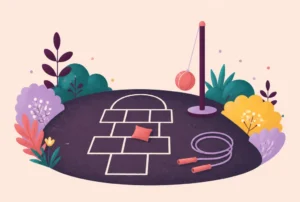
Four Square
Four players each guard one square and bounce a ball into each other’s squares; a player who misses goes to the back of the line and everyone moves up.
How to play
You need
A playground ball about 8 to 10 inches across, a painted or chalked court.
Setup
Use a painted court or chalk a large square about 10 to 16 feet on each side, split into four equal boxes. Number the boxes 1 to 4 going around; box 4 is the server’s box. Extra players line up outside box 1.
How to play
- The player in box 4 serves: drop the ball, let it bounce once in your own box, then hit it underhand into any other box.
- The receiver lets the ball bounce once in their box, then hits it with one or both open hands into any other box.
- Play continues until someone makes a mistake: the ball bounces twice in their box, they hit it out of the court, they catch or hold it, they hit it before it bounces in their box, or it lands back in their own box.
- The player who made the mistake leaves the court and goes to the end of the waiting line. Everyone below that box moves up one, and the first player in line enters box 1.
- Agree on line calls before the first serve. A common schoolyard rule is that a ball touching the outside line is in, and any ball whose call is in doubt is replayed.
- The server can call a special rule for their turn as server (only low hits, or bounce it twice), as long as it’s announced before the serve.
Safety notes
- Open hands only; no fists, kicks or spikes at someone’s face.
- The waiting line stands outside the court, behind box 1, not along the sides where balls fly.
Include everyone
- Wheelchair users: allow two bounces for any player in a chair, and let them catch and release with an open-hand push.
- Low vision: use a bright ball with a bell inside, and allow two bounces.
- Limited stamina: shrink the court so players reach the ball in a step or two.
Teacher tips
- Arguments about line calls end most four square games. Post the line rule on the wall or fence next to the court.
- Run two courts if the line is longer than four players, so nobody waits more than a few minutes.
Variations
- Two Square: two players, two boxes, same rules. Good for teaching the hit.
Hopscotch
Players toss a marker into numbered squares, then hop through the court on one foot, skipping the square with the marker.
How to play
You need
A chalked or painted hopscotch court, a flat stone, beanbag or bottle cap as a marker.
Setup
Chalk a court of 8 to 10 squares about 18 inches each, with single squares (one foot) and side-by-side pairs (two feet), numbered from the start. Draw a half-circle rest area at the far end.
How to play
- Player one tosses the marker into square 1. If it lands outside the square or on a line, their turn passes.
- Hop through the court, skipping the square with the marker: one foot on single squares, two feet on pairs.
- Turn around in the rest area and hop back. On the square before the marker, stop, pick it up without stepping down, and hop over the marked square.
- If you finish without stepping on a line or putting a hand down, toss to square 2 next turn.
- If you step on a line, lose balance or miss the square, your turn ends and you start from the same number next time.
- The first player to finish all the numbers wins the round.
Safety notes
- One player hops at a time; the next player waits behind the start line.
- Use a beanbag or a flat stone, not a rock, so nothing bounces into someone’s leg.
Include everyone
- Wheelchair users: roll the court instead, tossing the marker and rolling to the square without touching a line; or toss the marker and call the next numbers aloud for a partner.
- Limited stamina: two feet in every square, or hop only to the middle and back.
- Low vision: outline the court in thick, bright chalk or tape, and allow a partner to guide by voice.
Teacher tips
- Chalk three or four courts in a row so groups stay small.
- Kindergarteners can play a two-feet-everywhere version before trying single squares.
Variations
- Spell or count hopscotch: write letters or math facts in the squares; players call them out as they land.
Wall Ball
Also called: Handball
Players take turns hitting a ball against a wall with an open hand after one bounce; a miss sends you to the back of the line.
How to play
You need
A rubber playground ball or tennis ball, a flat, windowless wall, chalk.
Setup
Find a solid, windowless wall with flat ground in front of it. Chalk a line on the ground about 10 feet out; the ball must land inside this zone. Players line up beside the court, not behind the hitter.
How to play
- The first player bounces the ball once and hits it at the wall with an open hand.
- The next player lets it bounce once in the court and hits it back at the wall.
- Keep alternating in turn order.
- A player who misses, hits it twice or sends it outside the court goes to the end of the line.
- The last player standing in the rotation earns a point; then everyone rejoins and play starts over.
Safety notes
- No throwing the ball at a player, and no “stinger” rules where players can be hit for missing.
- The wall must have no windows, doors or vents nearby, and the waiting line stands to the side.
Include everyone
- Wheelchair users: allow two bounces, and hits with one or both hands from a seated position.
- Low vision: use a large bright ball and a shorter court.
- Limited stamina: play cooperative rounds where pairs count how many hits in a row they can get.
Teacher tips
- Set a rule that a player out goes straight to the back of the line, not to the bench, so turns come around fast.
- Use a softer ball for younger grades; a tennis ball moves too fast for most second graders.
Jump Rope with Rhymes
Also called: Long Rope, Skipping Rhymes
Two players turn a long rope while others take turns jumping in and doing the actions from a traditional rhyme.
How to play
You need
A long jump rope, 12 to 16 feet.
Setup
Pick two turners, who stand at each end with the rope touching the ground in the middle. Jumpers line up on one side, out of the rope’s swing. If you have more than one rope, keep at least 10 feet between groups.
How to play
- Turners swing the rope in big, steady loops at waist height.
- The first jumper runs in as the rope swings away from them, jumps while everyone chants, then runs out the other side.
- Try the traditional “Teddy Bear, Teddy Bear, turn around” rhyme: the jumper turns around, touches the ground, shows a shoe and jumps out on “that will do.”
- For a counting rhyme, chant “Bubble gum, bubble gum, in a dish, how many pieces do you wish?” and count each jump until the jumper misses.
- A jumper who misses takes a turn as a turner, and that turner joins the line.
Safety notes
- Turners swing at waist height; a rope swung overhead fast can sting.
- Waiting jumpers stand at least an arm and a rope length to the side, never behind the turners.
- One group per rope, and ropes at least 10 feet apart.
Include everyone
- Wheelchair users: a chair user can be a turner and the chant leader, or play “snake”: turners wiggle the rope along the ground and the chair user rolls over it.
- Deaf or hard of hearing: turners nod on each swing so the jumper can see the beat.
- Limited stamina: jumpers can stand still while turners swing low, rocking the rope side to side for small hops.
Teacher tips
- The turner swap is what keeps this fair. Turners are playing too; they just get to jump after the next miss.
- Teach entering from the side the rope swings away from, before teaching any rhyme.
Variations
- Short ropes for solo jumping: count to 20 without a miss, then try crossing your arms.
Elastics
Also called: Jump Band, Elastic Rope
Two players stand inside a loop of elastic held at their ankles; the jumper hops in, out and on the strands in a pattern, and the elastic moves higher each level.
How to play
You need
A loop of soft elastic about 10 feet around.
Setup
Two enders stand facing each other about 8 feet apart with the elastic loop around their ankles, pulled tight. The jumper stands beside it.
How to play
- The jumper does a pattern, for example: both feet in, both feet out, straddle the strands, land on both strands, jump out.
- If they finish without a mistake, the elastic moves up: ankles, then knees, then thighs.
- A jumper who misses switches places with an ender.
- Make up new patterns and give them names.
Safety notes
- Keep the elastic no higher than mid-thigh, so nobody trips on a high strand.
- Enders stand still; walking away while the elastic is stretched snaps it.
Include everyone
- Wheelchair users: be an ender with the elastic around the chair’s footrests, and call patterns for the jumper.
- Limited stamina: stay at ankle height and use walking steps over the strands.
- Low vision: use a bright elastic and keep the pattern short.
Teacher tips
- Students can tie the loop themselves from about 3 yards of wide sewing elastic; a craft store sells it by the yard.
- Hang an elastic on the classroom hook so it’s ready for indoor recess too.
Tetherball
Two players hit a ball tied to a pole in opposite directions, each trying to wrap the rope all the way around the pole.
How to play
You need
A tetherball pole with ball and rope, a chalk or painted circle split by a center line.
Setup
The court is a circle around the pole about 10 to 12 feet across, split down the middle. One player stands in each half. Players waiting stand outside the circle.
How to play
- Players decide who serves and which direction each will hit: one clockwise, one counterclockwise.
- The server holds the ball, tosses it up and hits it in their direction.
- The other player tries to hit it back the other way. Each player may hit the ball as many times as they can reach it.
- The first player to wrap the rope all the way around the pole wins. The winner stays, and the next player in line steps in.
- Fouls: touching the rope or the pole, catching or holding the ball, or stepping over the center line. On many playgrounds a foul ends the game for the player who made it; with younger kids, give one warning first.
Safety notes
- One player per side, always. Nobody else inside the circle.
- Never grab, wrap or swing on the rope.
- Hit with an open hand or fist on the ball only, and keep hands up near your face so a fast ball doesn’t catch you off guard.
Include everyone
- Wheelchair users: the chair user’s half can be a bit bigger, and the opponent hits only with their weaker hand.
- Low vision: play with a ball in a bright color and slow, underhand hits only.
- Limited stamina: play first to two wraps on a shortened rope, so games stay short.
Teacher tips
- Check the pole and rope before recess: a frayed rope or loose ball fitting gets taken down until it’s fixed.
- If the same player wins every game, add a rule that a three-time winner rotates out.
Marbles (Ring Game)
Also called: Ringer, Ring Taw
Players flick a shooter marble from outside a circle to knock target marbles out of the ring.
How to play
You need
About 10 marbles per player, one larger shooter marble per player, chalk, or string for a circle on carpet.
Setup
Draw a circle about 3 to 6 feet across on smooth ground or lay a string circle on carpet. Each player puts the same number of marbles in the middle, in a cross or a loose cluster.
How to play
- Players take turns. Kneel outside the ring with at least one knuckle touching the ground.
- Flick the shooter with your thumb at the marbles in the middle.
- Any marble you knock out of the ring is yours for the round, and you shoot again from where your shooter stopped.
- If you don’t knock any out, your turn ends; pick up your shooter.
- When the ring is empty, count. Then everyone gets their own marbles back for the next game.
Safety notes
- Marbles are a choking hazard: keep them away from younger siblings and kindergarten rooms, and never in mouths.
- Pick up every marble at the end so nobody slips on one.
Include everyone
- Wheelchair users: play on a table with a raised rim, or on a tray in the player’s lap.
- Limited hand strength: roll the shooter down a short ramp made from a ruler or cardboard tube instead of flicking.
- Low vision: use large, high-contrast marbles and a ring outlined in bright tape.
Teacher tips
- Play “for fair,” meaning everyone takes their own marbles home. Playing for keeps causes more arguments than it’s worth at school.
- A carpet square with a string circle makes a good indoor court.
Chalk Mazes and Obstacle Paths
Also called: Sidewalk Chalk Course
Students chalk a winding path with action stations (hop, spin, tiptoe) and everyone follows it.
How to play
You need
Sidewalk chalk.
Setup
Give a small group chalk and a section of blacktop. They draw a winding path at least 2 feet wide with symbols along the way: zigzags for hopping, spirals for spinning, footprints for tiptoe.
How to play
- Each group designs a path with five to eight action stations and a key at the start explaining the symbols.
- Groups walk their path once to test it.
- Groups rotate, and everyone follows another group’s path.
- Finish with a walk of the whole set.
Safety notes
- Paths stay on flat blacktop, away from parking areas and the bus loop.
- Keep stations simple: hops, spins, steps. No jumping off curbs.
Include everyone
- Wheelchair users: draw paths at least 4 feet wide with smooth curves, and swap hops for spins or reach-and-touch stations.
- Low vision: use thick lines in bright colors, and add a texture marker like a beanbag at each station.
- Limited stamina: keep the path short, with a “rest square” halfway.
Teacher tips
- Leave the paths for the next class; it’s a free station for the rest of the day.
- A number grid (1 to 20, in a 4 by 5 box) works as a math station inside the path.
Variations
- Spelling path: write letters in boxes and have students hop out their spelling words.
Circle and line games 8 games
Low-equipment games with one caller and everyone else in a circle or along a line. They suit younger grades, new groups and the first week of school, when kids are still learning each other’s names.
Red Light, Green Light
Players move toward the caller on “green light” and freeze on “red light”; anyone seen moving takes three steps back.
How to play
You need
Cones or a line for the start.
Setup
Mark a start line. The caller stands 40 to 60 feet away, facing the group.
How to play
- The caller turns their back and calls “Green light.” Players walk or run forward.
- The caller calls “Red light” and spins around. Everyone freezes.
- Anyone the caller sees moving takes three steps back (not all the way to the start).
- The first player to tag the caller’s hand becomes the next caller.
Safety notes
- On blacktop or a slick gym floor, walking only.
- Keep the caller well away from walls so nobody runs into one reaching them.
Include everyone
- Deaf or hard of hearing: the caller holds up a green or red card as well as calling.
- Wheelchair users: chair users get a head start of a few feet, or the caller uses a closer line for everyone on wheels.
- Low vision: pair with a sighted buddy, and use a whistle for red and a clap for green.
Teacher tips
- Three steps back instead of back to the start keeps slower players in the race.
- Add “yellow light” for slow motion once the group has the basics.
Variations
- Animal version: “green light, bunny hops” or “green light, bear crawl.”
Mother, May I?
Also called: Captain, May I?
Players ask permission before taking the steps the leader names; the leader can say yes, no or change the move.
How to play
Setup
Players stand on a start line. The leader stands about 30 feet away.
How to play
- The leader gives one player a move: “Jada, take three giant steps.”
- That player asks “Mother, may I?” (or “Captain, may I?”).
- The leader answers “Yes, you may” or “No, but you may take two baby steps.”
- A player who moves without asking takes one step back.
- The first to reach the leader becomes the next leader.
Safety notes
- Moves stay simple: hops, steps, spins, frog jumps. No backward running.
Include everyone
- Wheelchair users: steps become chair pushes (“three big pushes”).
- Deaf or hard of hearing: the leader shows the number of steps with fingers, and players sign or nod to ask.
- Sensory: a shy player can whisper the question to a buddy who says it aloud.
Teacher tips
- Go through every player in order so nobody waits too long for a turn.
- It’s a polite-asking game in disguise, which makes it a good first-week choice for kindergarten.
What Time Is It, Mr. Wolf?
Players creep toward the wolf by asking the time and taking that many steps; at “lunchtime,” the wolf chases them home.
How to play
You need
Cones for a start line.
Setup
Mark a home line. The wolf stands about 40 feet away with their back to the group.
How to play
- Everyone calls together, “What time is it, Mr. Wolf?”
- The wolf answers with a time, like “Four o’clock,” and players take four steps forward.
- Repeat until the wolf answers “Lunchtime.” The wolf turns and chases everyone back to the home line.
- Anyone tagged before reaching home joins the wolf as a wolf helper next round.
- When there are more wolves than players, start over with a new wolf.
Safety notes
- Home line is a set of cones on open ground, never a wall.
- One hand, two fingers, below the shoulders.
Include everyone
- Wheelchair users: steps become pushes, and the home line for chair users can be a few feet closer.
- Deaf or hard of hearing: the wolf holds up fingers for the number, and turns with both arms raised at lunchtime.
- Limited stamina: wolf helpers walk, and the play distance stays short.
Teacher tips
- Kids learn to count steps out loud, which helps with number sense in kindergarten.
- Rename the wolf for the season: Mr. Turkey in November, Mr. Snowman in January.
Duck, Duck, Goose (Everyone Gets a Turn)
Also called: Drop the Handkerchief
The classic circle chase, run so that each child gets picked: once you’ve been the goose, you sit with your legs crossed so the picker chooses someone new.
How to play
Setup
Players sit in a circle facing in, with space behind them. Choose a first picker.
How to play
- The picker walks around the outside, tapping heads gently and saying “duck” for each one.
- On “goose,” the tapped player gets up and chases the picker around the circle.
- The picker tries to sit in the goose’s empty spot before being tagged.
- The goose becomes the next picker either way. There’s no center “mush pot.”
- Players who have been the goose cross their arms so the next picker can see who hasn’t had a turn.
Safety notes
- Taps on the head are gentle, one hand only.
- Run around the circle, never across it, and leave a big gap between circle and walls.
Include everyone
- Wheelchair users: the circle sits on chairs, or the chair user picks and the goose speed-walks.
- Sensory: allow taps on the shoulder or a word-only version with no touch.
- Low vision: the picker says the player’s name with “goose,” and the chase becomes a walk with a guide.
Teacher tips
- The crossed-arms rule ends the problem of the same friends picking each other every round.
- With more than 15 players, run two circles.
Variations
- Water version on a hot day: the picker drips water from a cup, and the goose is the player who gets a splash.
Leader Says (No-Out Version)
Also called: Simon Says
Players only follow commands that start with “Leader says”; anyone fooled earns a point for the leader instead of sitting down.
How to play
Setup
Everyone stands facing the leader with room to stretch their arms.
How to play
- The leader gives commands, some starting with “Leader says” (“Leader says touch your toes”) and some without (“Touch your nose”).
- Follow the command only if it starts with “Leader says.”
- Anyone who follows a command without it stays in the game; the leader just gets a point.
- After ten commands, count the leader’s points, then pick a new leader. The leader with the most points wins.
Safety notes
- Keep moves safe to do beside a desk: touch, wiggle, stretch, balance. No jumping off chairs.
Include everyone
- Deaf or hard of hearing: the leader holds up a sign that reads “Leader says” for real commands.
- Wheelchair users: choose commands done with arms, head and upper body.
- Limited stamina: everyone can do the seated version.
Teacher tips
- Nobody sits out, so the kids who need movement most stay moving.
- Speed up and chain commands together to catch people out.
Variations
- Use the class name: “Room 12 says” or “Coach says.”
Follow the Leader
The line copies every move the leader makes as they walk a route around the play area.
How to play
Setup
Line up behind a leader. Agree on the area the line can travel.
How to play
- The leader walks, skips, hops or marches and adds arm moves.
- Everyone in line copies exactly.
- After a minute, the leader goes to the back and the next player leads.
- Keep going until everyone has led once.
Safety notes
- The route stays on flat ground; no climbing on equipment unless the class is already there.
- Leave space between players so a sudden stop doesn’t cause a pileup.
Include everyone
- Wheelchair users: the leader can be a chair user who sets the route and arm moves.
- Low vision: the player behind the leader holds a short rope loop, and the leader calls each new move aloud.
- Limited stamina: the leader chooses slow moves, and the line can stop for a balance pose.
Teacher tips
- Leading is the reward; a timer keeps turns even.
- Use it as the walk between recess stations, so changing stations is part of the game.
Crows and Cranes
Also called: Rats and Rabbits, True or False Tag
Two teams face each other at a center line; the caller names one team, which turns and chases the other back to its safe line.
How to play
You need
Cones for a center line and two safe lines.
Setup
Mark a center line and a safe line about 30 feet behind each side, with both safe lines well short of any wall. Count off into two teams; one is Crows and one is Cranes.
How to play
- Teams stand a few feet back from the center line, facing each other.
- The caller drags out the first sound: “Crrrrrrows” or “Crrrrrranes.”
- The called team chases; the other team runs for its safe line.
- Anyone tagged before the safe line joins the other team.
- Everyone returns to the center for the next call.
Safety notes
- One hand, two fingers, below the shoulders, and no diving.
- Chasers stop at the safe line.
Include everyone
- Deaf or hard of hearing: hold up a card with a crow or crane picture as you call.
- Wheelchair users: start chair users a few feet closer to their safe line.
- Limited stamina: shorten the field to 15 feet a side.
Teacher tips
- Throw in a fake now and then, like “Crrrrrackers.” Anyone who runs just walks back.
- Switch to true-or-false statements to review a lesson: true means Crows chase, false means Cranes chase.
Hot Potato Pass
Also called: Hot Potato
The circle passes a beanbag quickly while music plays; whoever holds it when the music stops answers a question.
How to play
You need
A beanbag or soft ball, music or a timer.
Setup
Players sit or stand in a circle. Prepare a list of easy questions (favorite animal, a math fact, something you’re good at).
How to play
- Start the music. Players pass the beanbag hand to hand around the circle as if it’s too hot to hold.
- Stop the music. Whoever is holding the beanbag answers a question or picks the next movement for the group.
- Start again. Nobody leaves the circle.
Safety notes
- Pass, don’t throw, so nobody gets a beanbag to the face.
Include everyone
- Deaf or hard of hearing: stop the round by raising a hand or flicking the lights instead of stopping music.
- Limited hand strength: pass a light scarf or a large soft ball instead of a beanbag.
- Wheelchair users: play at table height with players seated around a table.
Teacher tips
- A “pass” option keeps it comfortable for shy students; they can hand the question to a friend.
- Reverse the direction with a clap.
Indoor recess games 11 games
For rain, extreme heat or cold, and air-quality days. These work in a classroom with the desks where they are, and most need nothing more than a ball, paper or a whiteboard.
Thumbs Up, Seven Up
Also called: Heads Down, Thumbs Up
Seven pickers each quietly press down one seated player’s thumb; the picked players guess who chose them.
How to play
You need
Desks.
Setup
Seven players come to the front. Everyone else sits at their desk with head down, eyes closed and one thumb up.
How to play
- The teacher says “Heads down, thumbs up.”
- Each picker tiptoes around and gently presses down one thumb, then returns to the front.
- The teacher says “Heads up, seven up.” Players whose thumbs were pressed stand up.
- Each standing player guesses one picker. A correct guess swaps them into the picker’s place.
- Pickers reveal who picked whom, and the next round starts.
Safety notes
- A light press on the thumb only.
Include everyone
- Low vision: guesses can be made by voice; pickers say a word when they press so the guesser can listen for it.
- Sensory: a student who dislikes being touched can be a permanent picker or the round’s announcer.
- Deaf or hard of hearing: tap the desk once for heads down and twice for heads up, and agree on that before starting.
Teacher tips
- Use fewer pickers with a small class: Thumbs Up, Four Up works fine with 15 students.
- If peeking takes over, switch to Silent Ball for a few days.
Silent Ball
Also called: Quiet Ball
Players toss a soft ball around the room in total silence; a bad throw, a drop or a sound sends that player to a seat for one throw, then right back.
How to play
You need
A soft foam ball or a beanbag.
Setup
Players sit on their desks or stand at their spots. Clear anything breakable from shelves nearby.
How to play
- Toss the ball to any player in total silence.
- If a player drops a catchable ball, makes a bad throw or makes a sound, they sit down.
- A seated player comes back in when the next person sits.
- The teacher is the judge, and the round ends after five minutes.
Safety notes
- Underhand tosses only, with a foam ball or beanbag.
- Players stay at their spots; nobody climbs on desks to catch.
Include everyone
- Low vision: roll the ball across a table or the floor instead of tossing, and say the catcher’s name before rolling.
- Wheelchair users: catching at table height counts, and players can pass by rolling.
- Limited hand strength: use a beanbag or a large, light ball.
Teacher tips
- The one-out rule (you come back when the next player sits) keeps it from turning into watching.
- It’s a reset for a loud room. Two rounds and the noise drops.
Variations
- Spell it: each catcher silently writes the next letter of a spelling word on the board before throwing.
Four Corners
Players tiptoe to one of four numbered corners while the caller counts with eyes closed; the caller names a corner, and those players help call the next round.
How to play
You need
Four signs numbered 1 to 4.
Setup
Tape a numbered sign in each corner. Choose a caller who sits in the middle with eyes closed.
How to play
- The caller counts down slowly from ten while everyone quietly walks to a corner.
- At zero, the caller names a corner with eyes still closed.
- Players in that corner sit in the center as helpers. Helpers vote on the next corner to call.
- Keep going until only a few players are left; they become the next callers, and everyone rejoins.
Safety notes
- Walking only, and corners must be clear of desks, cords and shelves.
Include everyone
- Wheelchair users: clear wide paths to each corner, and give a longer count.
- Low vision: say the corner number aloud as students arrive, and use large, high-contrast signs.
- Deaf or hard of hearing: the caller holds up fingers for the corner number.
Teacher tips
- Helpers in the middle keep everyone involved.
- Use it for review: label corners A, B, C and D, ask a question, and students walk to the answer.
Variations
- Opinion corners: favorite season, favorite pizza topping. Nobody’s out, and it’s a getting-to-know-you game.
Charades
Also called: Act It Out
A player acts out a word or phrase without speaking while their team guesses before time runs out.
How to play
You need
Slips of paper with words or phrases, a timer.
Setup
Write animals, actions, sports and book titles on slips and put them in a jar. Count off into two teams.
How to play
- A player from one team draws a slip and acts it out without speaking or pointing at objects in the room.
- Their team calls out guesses until they get it or one minute runs out.
- A correct guess earns a point. Teams take turns.
- Teach the standard signs: fingers for the number of words, tapping a finger for which word, a cupped ear for “sounds like.”
Safety notes
- Actions stay on the spot; no rolling under desks.
Include everyone
- Deaf or hard of hearing: a natural fit; let guesses be written on a whiteboard as well as said.
- Low vision: switch to sound charades, where the actor makes sounds but uses no words.
- Wheelchair users: choose prompts that can be shown with upper body and face.
Teacher tips
- Kindergarten to second grade: use pictures on the slips and stick to animals and actions.
- Students can write slips from the week’s vocabulary list.
Draw and Guess
Also called: Sketch Guess, Board Drawing Game
One player draws a word on the board, with no letters or numbers, while their team guesses before the timer runs out.
How to play
You need
A whiteboard and markers, slips with words, a timer.
Setup
Prepare a jar of easy-to-draw words. Count off two teams.
How to play
- A player from team one draws a slip and has one minute to draw it.
- No letters, numbers or talking.
- Their team guesses aloud; a correct guess earns a point.
- Teams alternate. Everyone draws at least once.
Safety notes
- None needed beyond normal classroom rules.
Include everyone
- Low vision: draw large with thick markers, or let the drawer describe the shape with hand motions.
- Limited hand strength: let a partner hold the board steady, or draw on a tablet.
- Deaf or hard of hearing: guesses go on small whiteboards held up at the same time.
Teacher tips
- Let the drawer pass once per turn if the word is too hard.
- Use science or history words for a quick review.
Snowman Word Guess
Also called: Spell the Mystery Word
A friendly letter-guessing game: the class guesses letters of a hidden word, and every wrong guess adds a part to a snowman instead of a hanging figure.
How to play
You need
A whiteboard and marker.
Setup
The teacher or a student picks a word and draws a blank for each letter.
How to play
- Players guess one letter at a time.
- Correct letters go in their blanks; every place that letter appears gets filled in.
- A wrong guess adds one piece of the snowman: base, middle, head, hat, arms, nose, scarf.
- The class wins by solving the word before the snowman is finished.
Safety notes
- None needed.
Include everyone
- Low vision: use large letters, and read the board aloud after each guess.
- Deaf or hard of hearing: guesses are written on mini boards and held up.
- Limited hand strength: students call guesses out instead of coming to the board.
Teacher tips
- It replaces the old gallows drawing, which many schools no longer allow.
- Older grades can use phrases from the current unit.
Variations
- Spring version: draw a flower petal by petal instead of a snowman.
Dots and Boxes
Players take turns joining two dots; complete a box, initial it and go again. Most boxes wins.
How to play
You need
Paper and pencils, or a printed dot grid.
Setup
Draw a grid of dots, 5 by 5 for a quick game or 8 by 8 for a long one.
How to play
- Players take turns drawing one straight line between two dots next to each other.
- When your line completes a box, write your initial in it and take another turn.
- When all the boxes are filled, count. The player with the most boxes wins.
Safety notes
- None needed.
Include everyone
- Low vision: use a large grid printed with thick dots, or a pegboard and rubber bands.
- Limited hand strength: play on a whiteboard with a thick marker.
- Sensory: a quiet, two-player game for a student who needs a calmer recess.
Teacher tips
- Laminate a dot grid and use dry-erase markers so pairs can play again and again.
- It’s a strategy game: ask students what they notice about giving away the third side.
Freeze Dance
Also called: Statues
Students dance while the music plays and freeze when it stops; anyone still moving does a silly pose and keeps playing.
How to play
You need
Music.
Setup
Push chairs in and clear the aisles.
How to play
- Play music. Everyone dances in their own space.
- Stop the music. Everyone freezes like a statue.
- Anyone still moving does a funny freeze pose at the next stop instead of sitting out.
- Restart after a few seconds.
Safety notes
- Stay in your own space; no spinning into neighbors.
- Keep the volume reasonable for students who are sound sensitive.
Include everyone
- Deaf or hard of hearing: flick the lights or raise a sign to signal the freeze.
- Wheelchair users: dance with arms, head and upper body; freezes count the same.
- Sensory: offer headphones or a spot near the door with lower volume.
Teacher tips
- Call out a freeze shape at each stop: “freeze like a tree” or “freeze like a letter T.”
- Use clean, school-appropriate music, and preview it first.
I Have, Who Has
Also called: Chain Cards, Loop Cards
Each card says “I have ___. Who has ___?” Students listen for their answer, read their card and pass the turn along until the chain loops back to the start.
How to play
You need
One card per student, each with an answer and a question.
Setup
Make a set of cards that form a loop: the question on each card is answered by the next card, and the last card’s question is answered by the first. Hand one card to each student.
How to play
- The student with the starting card reads: “I have 12. Who has 3 times 5?”
- The student whose card begins with the answer reads next: “I have 15. Who has half of 20?”
- Keep going until the chain returns to the first card.
- Time the class, then shuffle and try to beat the time.
Safety notes
- None needed.
Include everyone
- Low vision: large-print cards, or a buddy who reads quietly with the student.
- Deaf or hard of hearing: project the current question on the board as it’s read.
- Sensory: students who dislike reading aloud can hold up their card for a partner to read.
Teacher tips
- Make extra cards so absent students don’t break the loop, or give two cards to fast readers.
- Works for any subject: math facts, sight words, vocabulary, state capitals.
Hot and Cold
Also called: Hide the Eraser, Hunt the Thimble
A seeker searches the room for a hidden object while the class guides with clues: warmer when they’re close, colder when they’re far.
How to play
You need
A small object, such as an eraser.
Setup
The seeker steps into the hallway with an adult or covers their eyes. Another student hides the eraser somewhere reachable and visible without opening anything.
How to play
- The seeker comes back and begins searching.
- The class says “warmer” when the seeker gets closer and “colder” when they move away.
- When the seeker gets very close, the class says “hot.”
- The finder chooses the next hider.
Safety notes
- Hiding spots stay at desk height or lower; no climbing or opening cabinets.
Include everyone
- Deaf or hard of hearing: use the quiet clapping version with visible hand claps, or thumbs up and down.
- Low vision: hide a larger, brightly colored object, or one with a ticking timer inside.
- Wheelchair users: keep hiding spots within reach of a seated player.
Teacher tips
- Quiet version: clap faster as the seeker gets close and slower as they move away.
- Keep a list of who has been seeker so every student gets a turn over the week.
Twenty Questions
Also called: Animal, Vegetable, Mineral
One player thinks of something; the class asks up to 20 yes-or-no questions to figure out what it is.
How to play
Setup
One student secretly writes their answer on a sticky note and folds it, so they can’t change it.
How to play
- The class takes turns asking yes-or-no questions.
- The answerer replies only yes, no or sometimes.
- Count questions on the board. The class can guess at any point, and each guess counts as a question.
- Solve it within 20 and the class wins the round; the student who solved it picks next.
Safety notes
- None needed.
Include everyone
- Deaf or hard of hearing: answers can be thumbs up, thumbs down and a flat hand for sometimes.
- Low vision: no materials are needed, and the count can be read aloud.
- Sensory: a student can answer with yes and no cards instead of speaking.
Teacher tips
- Teach good first questions (“Is it alive?” “Is it bigger than a desk?”) and it doubles as a lesson in narrowing down.
- Tie it to a unit: everything must be a planet, a historical figure or an animal.
Brain breaks 8 games
One to five minutes of movement at or beside the desk, between lessons. Short enough to fit anywhere, and calm enough that the class can sit back down and get to work.
Mirror Moves
Also called: Mirror Me
Partners face each other; one leads slow movements and the other copies them like a mirror.
How to play
Setup
Partners stand beside their desks facing each other, an arm’s length apart.
How to play
- Partner A leads slow arm, head and body movements.
- Partner B copies them as a mirror image at the same time.
- After 30 seconds, switch leaders.
- Finish with both partners trying to move together with no leader at all.
Safety notes
- Moves stay slow and in place.
Include everyone
- Wheelchair users: upper-body moves only; partners can sit facing each other.
- Low vision: partners hold the ends of a short ribbon and feel the movement, or the leader describes each move.
- Sensory: a student can mirror the teacher from their seat instead of a partner.
Teacher tips
- Slow is the point. If pairs speed up, call “slow motion.”
- It doubles as a focus exercise right before a test.
Stand Up If
Also called: Stand Up, Sit Down
The teacher reads statements; anyone they’re true for stands up, then sits back down.
How to play
Setup
Students sit at their desks.
How to play
- Read a statement: “Stand up if you have a pet.”
- Students it’s true for stand, look around, then sit down.
- Go quickly through eight to twelve statements.
- End with one everyone shares: “Stand up if you’re in this class.”
Safety notes
- Push in chairs or stand to the side so nobody trips over a chair leg.
Include everyone
- Wheelchair users: raise both arms instead of standing.
- Deaf or hard of hearing: project the statements on the board.
- Sensory: students can raise a hand if standing in front of others feels like too much.
Teacher tips
- Keep statements low-stakes: pets, foods, sports, places. Avoid anything about family money, religion or appearance.
- Add a move for each one: “stand up and do three squats if you like pizza.”
Alphabet Stretches
Also called: Body Letters
Students make letter shapes with their bodies, spelling out a word or the alphabet one stretch at a time.
How to play
Setup
Students stand beside their desks with room to reach their arms out.
How to play
- Call a letter. Students make it with their body: arms up for Y, hands on hips for a rough O, one arm across for T.
- Hold each shape for a slow count of five.
- Spell a short word together, one letter at a time.
- Let a student pick the next word.
Safety notes
- No backbends or headstands; hold shapes standing or seated.
Include everyone
- Wheelchair users: letters made with arms and upper body, or drawn in the air with a finger.
- Low vision: describe each shape in words as you call the letter.
- Limited stamina: hold each shape for a count of three.
Teacher tips
- Use this week’s spelling words.
- Partners can make letters together, which makes the tricky ones (like K) possible.
Rock-Paper-Scissors Cheer Chain
Also called: Rock Paper Scissors Tournament
Students play rock-paper-scissors in pairs; whoever loses becomes the winner’s cheering section, following them to the next match until the whole room is cheering for two finalists.
How to play
Setup
Everyone stands. Allow walking in the aisles.
How to play
- Pair up and play one throw of rock-paper-scissors.
- The player who loses becomes the winner’s fan, follows them and cheers their name.
- Winners find another winner and play again, with their fans cheering.
- The chains grow until two players remain, with half the class behind each.
- Play the final with the whole room cheering.
Safety notes
- Walking only between matches, and keep cheering at a classroom-friendly level.
Include everyone
- Wheelchair users: winners come to the player, so chair users don’t need to cross the room.
- Deaf or hard of hearing: cheering can be hand waves; throws are visual anyway.
- Low vision: say “rock,” “paper” or “scissors” aloud as you throw.
Teacher tips
- Losing is fun here, since fans get to be loud. That’s why it works for a tired class.
- Set a two-minute limit. If the final isn’t done, call a tie.
Count and Move
Also called: Skip Count Moves
Students count aloud by ones, twos, fives or tens, doing one move per number.
How to play
Setup
Students stand beside their desks.
How to play
- Pick a move: jumping jacks, toe touches, marching in place.
- Count aloud by fives to 50, doing one move per number.
- Switch the move and the count: by twos to 30 with arm circles.
- Finish counting backward from 10 in a whisper with slow stretches.
Safety notes
- Stay beside your desk with clear space for arms.
Include everyone
- Wheelchair users: arm moves and seated marching.
- Limited stamina: alternate every other number with a rest.
- Deaf or hard of hearing: write the count on the board, and point as you go.
Teacher tips
- Matches the counting students are working on in math.
- Older grades: count by sevens or count multiples of the day’s date.
Would You Rather Move
Also called: This or That Moves
The teacher asks a would-you-rather question, and students answer with a move: one choice means one move, the other choice means another.
How to play
Setup
Students stand beside their desks.
How to play
- Ask a question: “Would you rather be a fish or a bird?”
- Fish swim in place with arm strokes; birds flap their arms.
- Hold the move for 10 to 15 seconds, then ask the next question.
- Ask five or six questions.
Safety notes
- Moves stay in place and on the floor.
Include everyone
- Wheelchair users: each move has an arm-only version.
- Deaf or hard of hearing: show both choices on the board with a picture of the move.
- Sensory: offer a small-move option, like tapping a desk.
Teacher tips
- Keep the choices silly and harmless: pizza or tacos, rain or snow, cats or dogs.
- Let students write questions for next week on scrap paper.
Desk Stretch Sequence
Also called: Chair Stretches
A calm sequence of seated and standing stretches to reset after long sitting.
How to play
Setup
Students sit tall at their desks with feet on the floor.
How to play
- Reach both arms overhead and stretch tall; breathe in for four counts, out for four.
- Roll shoulders back five times, then forward five times.
- Twist gently to the right, hands on the chair back, then to the left.
- Stand behind the chair, hold the back and rise up on your toes ten times.
- Sit, close your eyes and take three slow breaths before starting work.
Safety notes
- Stretch only until it feels like a stretch, never pain.
- Chairs stay on all four legs; no tipping back.
Include everyone
- Wheelchair users: every move works seated; replace the toe rises with arm reaches.
- Low vision: describe each stretch in words as you go.
- Limited stamina: stay seated for the whole sequence.
Teacher tips
- Run it after lunch or before an assessment, when the room needs to settle.
- Let a student lead it after the first week.
Brain Break Dice
Also called: Fitness Dice, Exercise Dice
Roll one die for a move and one for an amount, and the whole class does it together.
How to play
You need
Two printable dice (see the printable below), or two regular dice and a chart.
Setup
Print and fold the two brain break dice, or tape a chart to the board that matches numbers on regular dice to moves and amounts.
How to play
- A student rolls both dice.
- Read them together: “Jumping jacks, 10 times.”
- The class does the move together, counting aloud.
- Roll two or three times, then sit down.
Safety notes
- Every move is safe beside a desk; no running.
Include everyone
- Wheelchair users: keep a matching arm-only version of each move on the board.
- Low vision: read the roll aloud, or use large dice with raised dots.
- Limited stamina: halve the amount, or turn “double it” into “take a breath.”
Teacher tips
- Give the roller job to a different student each break; it’s a job kids line up for.
- Write the class’s own move ideas on a blank die for later in the year.
Cooperative and inclusive games 9 games
Games where the whole group wins or nobody does. Nobody gets knocked out, and each one includes changes so students who use wheelchairs, have low vision or need a quieter setup can play the same game as everyone else.
Parachute Games
Also called: Parachute Play
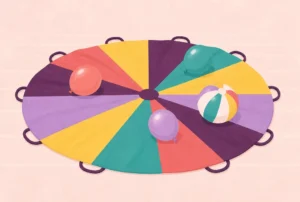
The group holds the edge of a big parachute and makes waves, domes and popcorn together.
How to play
You need
A play parachute 12 to 24 feet across, a few soft balls.
Setup
Spread the parachute out on an open floor or field. Players space themselves evenly around the edge and grip the handles or the edge.
How to play
- Waves: everyone shakes the edge to make small, then big, waves.
- Popcorn: toss a few soft balls on top, and shake to bounce them without letting them fly off.
- Mushroom: everyone lifts the parachute high on “three” and takes three steps in, then lets it float down.
- Color swap: lift high and call a color; players on that color run under to a new spot before it comes down.
- Finish by lowering slowly and laying it flat.
Safety notes
- Nobody runs under while the parachute is coming down; color swaps happen only during the lift.
- No one lies under the parachute, and nobody wraps the edge around hands or body.
- Hold handles loosely; let go if you start to fall.
Include everyone
- Wheelchair users: a chair user can hold the edge from their seat; during color swaps, others roll them under on the lift if they want to go.
- Low vision: call each move with a clear count, and stand a buddy next to them for runs under.
- Sensory: offer a spot at the edge that only does waves, not runs under.
Teacher tips
- Teach the “hold it still” signal first, so you can stop the group instantly.
- Practice the mushroom twice before adding runs under it.
Variations
- Cat and mouse: one player crawls under as the mouse, one walks on top on knees as the cat, and the group makes waves to hide the mouse. Only on grass or mats.
Balloon Keep-Up
Also called: Keep It Up
Small groups try to keep a balloon off the floor for as many hits as possible, counting together.
How to play
You need
Latex-free balloons (one per group of four to six).
Setup
Blow up latex-free balloons. Count off groups of four to six, spread out across the room.
How to play
- Each group stands in a small circle and taps its balloon into the air.
- Count each hit out loud. Nobody can hit twice in a row.
- If the balloon touches the floor, start the count over.
- Try for a group record, then add a rule: only elbows, only one hand, or everyone must touch it before 10.
Safety notes
- Use latex-free balloons; latex allergies can be serious, and it’s common for schools to ban latex.
- Pick up popped balloon pieces right away; they’re a choking hazard for younger children.
- Clear the space of chairs before groups start chasing balloons.
Include everyone
- Wheelchair users: hits with a pool noodle or paddle count, and groups play at a height everyone can reach.
- Low vision: put a bell or a few grains of rice inside the balloon so it makes a sound.
- Limited stamina: play seated in chairs in a circle.
Teacher tips
- Counting together is the point: groups compete with their own record, not each other.
- Write each group’s record on the board for indoor recess the next day.
Beach Ball Questions
Also called: Question Ball
Toss a beach ball around the room; the catcher answers the question under their right thumb.
How to play
You need
A beach ball with questions written on each stripe in permanent marker.
Setup
Write a question on each stripe or section of an inflated beach ball: favorite food, a place you’d like to visit, something you’re good at, a math fact.
How to play
- Toss the ball gently to a classmate.
- The catcher reads the question under their right thumb and answers it.
- They toss to someone who hasn’t caught it yet.
- Keep going until everyone has had a turn.
Safety notes
- Underhand tosses only, and call a name before throwing.
Include everyone
- Low vision: roll the ball instead of tossing, and read the question aloud for the catcher.
- Wheelchair users: tosses go to the chest, and a roll across a table counts.
- Deaf or hard of hearing: point before tossing, and let answers be written or signed.
Teacher tips
- A “pass” option keeps it comfortable; the catcher can ask a friend to answer.
- Make a second ball for review questions.
Cooperative Musical Hoops
Also called: Musical Chairs Where Nobody's Out
Like musical chairs, but when a hoop is removed, nobody leaves: everyone has to share the hoops that are left.
How to play
You need
Plastic hoops or carpet squares, music.
Setup
Lay out one hoop for every two players on the floor.
How to play
- Play music. Players walk or skip around the hoops.
- When the music stops, everyone gets at least one foot inside a hoop.
- Remove one hoop each round. Nobody’s out; groups have to squeeze in and help each other.
- Stop when the whole class fits in two or three hoops, and cheer for the group.
Safety notes
- Walking only, and no pushing to get into a hoop.
- Stop before groups get so crowded that anyone could fall.
Include everyone
- Wheelchair users: a chair user’s hoop counts if one wheel or a hand is in it, and others come to them.
- Sensory: a player can touch a hoop’s edge with a hand instead of squeezing in.
- Deaf or hard of hearing: flick the lights to stop the round.
Teacher tips
- The ending is the best part: the whole class balancing together.
- Use carpet squares in a classroom; hoops slide on tile.
Group Juggle
Also called: Name Juggle
A circle passes one ball in a set order, then adds more balls to keep several moving at once.
How to play
You need
Three to five soft balls or beanbags.
Setup
Stand in a circle of six to fifteen.
How to play
- Toss a ball to someone across the circle, saying their name. They toss to someone new, until everyone has had it once and it comes back to the start.
- Repeat the same order until the group knows it.
- Add a second ball, then a third, all following the same order.
- Count how many balls the group can keep moving without a drop.
Safety notes
- Underhand tosses only.
Include everyone
- Low vision: use a ball with a bell, say the name before each toss, and allow rolls.
- Wheelchair users: tosses go to the chest; a bounce pass counts.
- Limited hand strength: use beanbags, which are easier to catch than balls.
Teacher tips
- Have players raise a hand until they’ve received the ball the first time, so the starter can see who’s left.
- A great first-week game: everyone learns names fast.
Pass the Hoop
Also called: Hoop Circle
The circle holds hands and passes a hoop all the way around without letting go.
How to play
You need
One or two plastic hoops.
Setup
Players stand in a circle holding hands. Hang a hoop over one pair’s joined hands.
How to play
- Move the hoop over your body and pass it to the next person without letting go of hands.
- Keep going until it travels all the way around the circle.
- Time the group, then try to beat the time.
- Add a second hoop going the other way.
Safety notes
- If someone loses balance, let go of hands.
- Use a large hoop for bigger kids.
Include everyone
- Wheelchair users: use a large hoop, and the group helps lift it over the chair.
- Sensory: players who dislike holding hands can hold a short scarf between them instead.
- Limited stamina: sit in chairs in a circle.
Teacher tips
- Let the group plan before the second try; they’ll find faster ways to step through.
- Great for showing that the group is only as fast as its slowest pass, and that’s fine.
Human Knot
Also called: Tangle
A small group grabs hands across the circle to make a tangle, then works to untangle it into one circle without letting go.
How to play
Setup
Groups of six to ten stand in a tight circle.
How to play
- Each player reaches across and holds hands with two different people, never someone right next to them.
- Without letting go, the group steps over and under arms to untangle.
- The goal is one big circle (sometimes two linked circles).
- If you’re truly stuck after five minutes, the group can unhook one pair of hands and reconnect.
Safety notes
- Loosen grips so wrists can turn, and let go if anything hurts.
- No climbing on each other.
Include everyone
- Sensory: play with short ropes or scarves, so nobody holds a hand.
- Wheelchair users: a chair user can be the group’s director, calling the moves from outside the knot.
- Low vision: call each step aloud, and let the group guide with words.
Teacher tips
- It’s close contact. Offer the option of holding the ends of short scarves or ropes instead of hands.
- Groups of six to eight work best; bigger knots take too long.
Lily Pad Crossing
Also called: Cross the River, Stepping Stones
A team crosses a pretend river by stepping only on lily pads, which they must pass forward and share without losing any.
How to play
You need
Carpet squares or poly spots (fewer than the number of players), two lines for river banks.
Setup
Mark two river banks about 30 feet apart. Give each team of six to eight one fewer lily pad than they have players.
How to play
- The team must get everyone from one bank to the other, stepping only on lily pads.
- Players can share pads and pass pads forward.
- A pad that nobody is touching floats away; the adult removes it.
- If a foot touches the river, that player goes back to the start bank; nobody’s out.
- When the whole team is across, celebrate and try again with one fewer pad.
Safety notes
- Use non-slip spots or carpet squares rubber side down.
- No piggyback rides or lifting teammates.
Include everyone
- Wheelchair users: a chair user’s wheels count as on the pad if they roll over two pads, or they can be the river guide calling where pads go.
- Low vision: use pads in a high-contrast color, with a teammate describing each step.
- Limited stamina: shorten the river to 15 feet.
Teacher tips
- Step back and let the team plan; the planning is the game.
- Keep teams small enough that everyone has a job.
Sound Ball Roll
Also called: Bell Ball Pass
Seated players roll a bell ball across a circle and stop it by sound; sighted players can wear eye masks so everyone plays the same way.
How to play
You need
A ball with a bell inside, optional: blindfolds or sleep masks for sighted players.
Setup
Players sit on the floor in a circle with legs apart, so their feet touch the next player’s. Sighted players can choose to wear eye masks.
How to play
- Say a player’s name and roll the ball along the floor to them.
- That player listens, stops the ball and rolls it to someone else, saying their name.
- Count how many passes the circle can make without the ball leaving the circle.
- Make the circle bigger as the group gets better.
Safety notes
- Rolls only; no throwing.
- Eye masks are optional; anyone can play with eyes open.
Include everyone
- Low vision: built in; students with low vision can be the game’s leaders.
- Wheelchair users: play at a table with a raised rim, rolling the ball across.
- Deaf or hard of hearing: play with eyes open and a brightly colored ball, so the game works visually.
Teacher tips
- This game is based on how sports for blind and low-vision athletes work, and it puts every student on the same footing.
- Keep the room quiet; that’s part of the challenge.
Field day stations 8 games
Classic races and toss games for a field day rotation. Each station needs one adult, water nearby and a shady spot for the group waiting its turn.

Three-Legged Race
Partners tie their inside ankles together and race to the finish as a three-legged team.
How to play
You need
Soft ties (fabric strips, bandanas or hook-and-loop straps), cones for start and finish.
Setup
Mark a straight course of 20 to 30 yards on grass. Pair players of similar height. Tie inside ankles together with a soft fabric tie, snug but not tight.
How to play
- Before racing, partners practice walking with arms around each other’s shoulders or waists.
- Agree on a count: inside foot on “one,” outside foot on “two.”
- On “go,” pairs walk, then jog, to the finish line.
- If a pair falls, they stand up together and keep going.
Safety notes
- Grass only, never blacktop.
- Tie at the ankle with soft fabric, never at the knee or with rope, and loose enough to slip a finger under.
- Walk-only heats for younger grades.
Include everyone
- Wheelchair users: partner with a walker who holds the chair’s armrest, racing as a pair without ties.
- Limited stamina: a shorter course, or a walking heat.
- Sensory: pairs can hold opposite ends of a short scarf instead of tying ankles.
Teacher tips
- Pair by height, not by friendship, and let partners practice for a minute before the race.
- Have extra ties ready; knots come loose.
Sack Race
Also called: Potato Sack Race
Players stand in a sack, hold it at the waist and hop to the finish.
How to play
You need
Burlap or nylon sacks, cones for start and finish.
Setup
Mark a course of 15 to 25 yards on grass. Lay sacks at the start line with lanes at least 6 feet apart.
How to play
- Each racer steps into a sack and holds the top edge at the waist.
- On “go,” hop to the finish line.
- If you fall, stand up and keep hopping.
- In relay version, hop to the cone and back, then hand the sack to the next teammate.
Safety notes
- Grass only, with lanes spaced so falling racers don’t collide.
- Sacks come up to the waist, never over the head.
Include everyone
- Wheelchair users: race a scarf-on-lap course, rolling to the cone without dropping the scarf.
- Limited stamina: walk or shuffle in the sack.
- Low vision: a lane rope or a guide runner calling from the finish.
Teacher tips
- Kindergarten version: shuffle-walk in the sack instead of hopping.
- Nylon sacks last longer and don’t scratch legs.
Egg-and-Spoon Race
Also called: Spoon Race
Racers carry a plastic egg on a spoon to the finish without touching it; a dropped egg means stop, pick it up and keep going.
How to play
You need
Plastic eggs, large plastic or metal spoons, cones.
Setup
Mark a short course with cones. Give each racer or relay team a spoon and a plastic egg.
How to play
- Hold the spoon handle with one hand and balance the egg on it.
- On “go,” walk quickly to the cone and back.
- If the egg falls, stop, put it back on the spoon and continue from that spot.
- In relay version, pass the spoon and egg to the next teammate without touching the egg.
Safety notes
- Plastic eggs only. Raw eggs make slippery messes and carry salmonella risk.
- Walking pace on blacktop.
Include everyone
- Wheelchair users: carry the spoon in one hand and push with the other, or rest a larger bowl-shaped spoon on the lap.
- Low vision: use a bright egg, and a lane marked with tape or a guide calling from the finish.
- Limited hand strength: use a wider spoon or a ladle.
Teacher tips
- Put a little sand or a pebble in each plastic egg so it doesn’t blow off in the wind.
- Older grades can make it harder: walk backward, or carry the spoon in the hand they don’t write with.
Bean Bag Toss
Also called: Target Toss, Beanbag Bucket Toss
Players toss beanbags at targets worth different points from a set distance.
How to play
You need
Beanbags, targets: hoops, buckets, a board with holes or chalk circles.
Setup
Set out targets: three hoops or buckets at different distances, worth 1, 3 and 5 points. Mark a throwing line about 10 feet back for younger grades and 15 to 20 feet for older ones.
How to play
- Each player throws three beanbags underhand from the line.
- Add the points for every bag that lands in or on a target.
- Players collect their bags only after everyone has thrown.
- Teams add up their totals.
Safety notes
- Nobody crosses the line to collect bags until the adult says “clear.”
- Underhand tosses only.
Include everyone
- Wheelchair users: a closer line or a table-height target.
- Low vision: put a beeper or a bell on the target, and allow a guide to tap the target before each throw.
- Limited hand strength: use lighter bags or roll balls at targets on the ground.
Teacher tips
- Run two lanes to keep the line short.
- A math version: targets show numbers, and players multiply their two best scores.
Relay Race Menu
Also called: Shuttle Relays
Teams take turns racing to a cone and back with a different move each round: run, skip, crab walk, gallop, dribble a ball.
How to play
You need
Cones, a baton or beanbag per team.
Setup
Count off teams of four to six (not captains picking). Line teams up behind a start line with a cone 15 to 25 yards away for each.
How to play
- The first runner goes around the cone and back, then hands the baton to the next teammate.
- Continue until every player has gone.
- Change the move each round: skip, gallop, side-step, crab walk, bear crawl or dribble.
- Finish with a cheer for every team, not just the fastest.
Safety notes
- Lanes at least 10 feet apart, and finish lines away from fences and walls.
- Crab walks and bear crawls on grass only.
Include everyone
- Wheelchair users: a chair user races the same lane; the move for that round can be an arm-driven version, or the cone moves closer.
- Low vision: a guide runner or a lane rope.
- Limited stamina: shorter lanes, or a walking round.
Teacher tips
- Short teams mean more turns and less waiting.
- Mix the moves so the fastest sprinters don’t win every round.
Water Sponge Relay
Also called: Sponge Bucket Relay
Teams carry water from one bucket to another using only a sponge; the team that moves the most water wins.
How to play
You need
One large sponge per team, two buckets per team (one full of water, one empty), measuring cup or ruler.
Setup
For each team, set a full bucket at the start and an empty one 15 to 20 yards away on grass.
How to play
- The first player soaks the sponge, runs to the empty bucket and squeezes it out.
- They run back and hand the sponge to the next player.
- Keep going for five minutes.
- Measure the water in each team’s bucket with a ruler to find the winner.
Safety notes
- Grass only, since spilled water makes blacktop slippery.
- Tell families ahead so students can wear clothes that can get wet, and have a dry shirt plan for anyone who needs one.
Include everyone
- Wheelchair users: carry the sponge in a small bowl on the lap, or join the pass-down-the-line version.
- Sensory: a student who dislikes getting wet can measure and keep score.
- Limited stamina: the overhead-pass version, with no running.
Teacher tips
- On a hot day, this is the most popular station; run it after the hot running events.
- Pass the sponge overhead down a line instead of running for a lower-energy version.
Obstacle Course
A loop of simple stations (weave through cones, step through hoops, crawl through a tunnel, hop across spots) that players run one at a time.
How to play
You need
Cones, hoops, a low tunnel or table, jump ropes laid flat, poly spots.
Setup
Lay out the stations in a loop. Mark the start and finish at the same spot so waiting players can see the whole course.
How to play
- Walk the class through the course once, showing each station.
- Send players one at a time, about 10 seconds apart.
- Each player finishes the loop and returns to the end of the line.
- Time individual runs, and let players try to beat their own time.
Safety notes
- No climbing or jumping off anything higher than a low step.
- Space start times so players don’t catch up and collide at a station.
Include everyone
- Wheelchair users: a parallel route with wide cone weaves, a ramp, and a toss station.
- Low vision: bright cones, a rope guideline, and a buddy who calls each station.
- Limited stamina: halve the loop, and allow walking.
Teacher tips
- Timing each player against their own time keeps it fair for every ability.
- Station ideas from the PE closet: scooter boards, balance beams on the floor, beanbag targets.
Tug-of-War (With Safety Rules)
Also called: Rope Pull
Two even teams pull a rope in opposite directions to drag the center marker over their line. Include it only with every safety rule below; otherwise leave it off the schedule.
How to play
You need
A thick tug-of-war rope with a center marker, cones for a center line, gloves for every puller.
Setup
Lay the rope on grass, with the center marker over a center line and a line marked 6 feet each way. Count off two teams of equal size and similar size (never more than ten per side). Every puller wears gloves. An adult stands at each end of the rope and one at the center.
How to play
- Players hold the rope with both hands, standing to one side of it, feet apart.
- The center adult calls “Take up the slack,” then “Pull.”
- The team that pulls the marker past its line wins the pull.
- Pulls last no more than 30 seconds; the center adult calls “Stop” and everyone sets the rope down at the same time.
- Swap sides and pull again.
Safety notes
- The rope is never wrapped around hands, wrists, waist or any part of the body, and nobody ties it to anything.
- Gloves for everyone, an adult at each end and the center, and a team that falls lets go at once.
- If you don’t have enough adults or gloves, or the field is wet, skip it; there are better stations.
Include everyone
- Wheelchair users: chair users can be the center judge, or pull from a locked chair at the front of the rope with an adult beside them.
- Sensory: offer the scorekeeper or caller role.
- Limited stamina: shorter pulls of 15 seconds.
Teacher tips
- Most tug-of-war injuries come from wrapping the rope or from a sudden release. The “set it down together” rule handles the second one.
- Teachers vs. students works as the last event, with the same rules.
Sample plans
Four ready-made plans built from games on this page: a rainy-day indoor recess, an outdoor station rotation, a day of brain breaks and a field day. Add one to your print list and the PDF starts with a one-page run sheet.
Indoor recess, grades K-2, 25 minutes
One classroom, desks in place, 18 to 25 students · 25 minutes
- Settle in and explain the plan2 min
- Freeze DanceMovement to start5 min
- Hot and ColdQuiet guessing game6 min
- Balloon Keep-UpGroup challenge6 min
- Four CornersWhole-class game4 min
- Alphabet StretchesCalm-down stretch before lessons2 min
Start with movement to burn off the energy that would have gone outside, go quiet in the middle, then do one more group game. The stretch at the end sets up the next lesson.
Outdoor recess stations, grades 3-5, 30 minutes
Two or three classes, a blacktop and a field, one adult per station · 30 minutes
- Walk to stations and review rules3 min
- Four SquareBlacktop station8 min
- Sharks and MinnowsField station8 min
- Jump Rope with RhymesRope station8 min
- Water and line up3 min
Three stations, three groups, eight minutes each, then rotate. Counting off groups at the door keeps the stations even, and the water break at the end matters on warm days.
A full school day of brain breaks
One classroom, any grade from K to 8 · 13 minutes
- Brain Break DiceMid-morning, after the first long lesson3 min
- Stand Up IfBefore lunch3 min
- Desk Stretch SequenceAfter lunch, to settle the room3 min
- Rock-Paper-Scissors Cheer ChainMid-afternoon slump4 min
Four short breaks spread across the day: an active one in the morning, a light one before lunch, a calming one after lunch and a loud, social one when the afternoon drags.
Field day rotation, 75 minutes
A grade level split into five groups, one adult per station, water at every station · 75 minutes
- Opening and safety talk5 min
- Three-Legged RaceStation 112 min
- Egg-and-Spoon RaceStation 212 min
- Bean Bag TossStation 312 min
- Water Sponge RelayStation 412 min
- Relay Race MenuStation 512 min
- Water, shade and closing cheer10 min
Five stations of about 12 minutes, including the walk between them. Put the water station after the races, keep a shaded wait area at each station, and plan rotations so no group runs two high-energy events in a row in the heat.
Indoor recess activity lists by grade band
Post one of these by the door before the first rainy day. Each list is a one-page menu of indoor recess games for that grade band, with space at the bottom for your own class favorites and your school’s indoor recess rules. Every game links to its full rules above.
Grades K-2
Grades 3-5
Ready-made PDF of all three lists: indoor recess activity lists.
Printable brain break dice
Two paper cubes: the first die says what to do, the second says how many or how long. A student rolls both and the whole class moves beside their desks. Print on card stock, cut on the outline, fold on the lines and tape or glue the tabs. See Brain Break Dice for how to run it.
Recess planning: what the guidance says
The CDC and SHAPE America published Strategies for Recess in Schools (2017) and a companion recess planning guide. Both are free on the CDC’s recess page. These are the points most schools act on first, in our words.
- Schedule at least 20 minutes of recess every day for elementary students, and treat 20 minutes as a floor, not a ceiling.CDC and SHAPE America, Strategies for Recess in Schools, 2017
- Don't keep students in from recess as a consequence for behavior or unfinished classwork, and don't use exercise at recess as a punishment.CDC and SHAPE America, Strategies for Recess in Schools, 2017
- Schedule recess before lunch, so students play first and then eat.CDC and SHAPE America, Strategies for Recess in Schools, 2017
- Write down where indoor recess happens and what students do there before the first rainy day, along with weather rules for when recess moves inside.CDC and SHAPE America, Strategies for Recess in Schools, 2017
- Train recess staff and volunteers on the games, the equipment and how to step in, and give them ongoing training rather than a one-time talk.CDC and SHAPE America, Strategies for Recess in Schools, 2017
- Stock enough equipment for students to choose from, such as balls, jump ropes, beanbags, hoops and flying discs, including items students with disabilities can use.CDC and SHAPE America, Strategies for Recess in Schools, 2017
- Paint or chalk lines for four square and hopscotch, and split the playground into zones for sports, skills and quiet play.CDC and SHAPE America, Strategies for Recess in Schools, 2017
- Post activity cards or a weekly game menu so students have ideas to pick from.CDC and SHAPE America, Strategies for Recess in Schools, 2017
- Teach conflict-resolution steps, like rock-paper-scissors for close calls, so students can settle disputes without stopping the game.CDC and SHAPE America, Strategies for Recess in Schools, 2017
Inclusive play and safety
Every game has its own safety notes and ideas for including students with disabilities. These are the rules underneath them. Your school’s policies, students’ IEPs and 504 plans, and advice from your adapted PE teacher come first.
Include everyone
- No long eliminations. Players who are tagged or out come back fast, or take a real job (judge, caller, scorekeeper). If a game leaves kids sitting out, change the rule.
- Fair teams. Count off, draw cards or use colors. Never have captains pick teams one by one.
- Wheelchair users often need a wider play area, a soft ball that rolls slower, and tags with a pool noodle or a raised hand. Ask the student what works.
- Low vision: bright or sound balls, high-contrast lines and a buddy guide. Deaf or hard of hearing: pair every call with a visual signal (raised arm, flag, lights).
- Sensory needs: warn before whistles and loud games, offer a quiet zone, and let students choose low-contact roles.
- Choice counts. A student who’d rather jump rope alone than play tag is still playing.
Safety basics
- Tags are one hand, two fingers, below the shoulders. No pushing, pulling clothes or tackling.
- Keep running games well away from walls, fences, poles and play equipment, and walk the boundaries first.
- Water breaks in hot weather, and move high-energy games to the shade or inside when the heat index is high.
- When thunder roars, go indoors. Move everyone inside at the first thunder and wait 30 minutes after the last (National Weather Service).
- Check for latex allergies before using balloons, and use plastic eggs for egg-and-spoon races.
What we left out on purpose
- Dodgeball and other games where hitting someone is the goal.
- Red rover and British bulldog-style games where players crash into linked arms or tackle.
- Games that make one child the target or leave them out for the rest of recess.
Printable game cards
Every game prints as a half-page card with setup, numbered rules, safety notes, inclusion ideas and teacher tips, two cards to a sheet. Print your list, the games your filters show, or all 60. Keep a set in the recess bin or the sub folder. Cards are built in your browser, and nothing is uploaded.
Ready-made PDFs of all 60 cards: US Letter · A4. Print at 100% (“Actual size”). More help: printing tips.
For teachers, PE staff and librarians
No ads, no sign-up, no email wall. Free to print and copy for your school.
You’re welcome to link to this page from a school wellness page, a PE or recess resource list, a staff handbook or a library guide. To cite it:
Party Game Book Editors. (2026). Recess games and brain breaks: Playground, indoor recess and classroom movement games. Party Game Book. https://partygamebook.com/recess-games/
Party Game Book Editors. “Recess Games and Brain Breaks: Playground, Indoor Recess and Classroom Movement Games.” Party Game Book, 2026, partygamebook.com/recess-games/.
Every game has its own address, for example partygamebook.com/recess-games/#four-square
- 60 games in 7 types, each with players, grades, space, time, energy, setup, rules, safety notes, inclusion ideas and teacher tips.
- Original write-ups of traditional playground and classroom games. We didn’t invent them and don’t claim to; the wording and the notes are ours.
- Printables: game cards (US Letter and A4), indoor recess lists for K-2, 3-5 and 6-8, and brain break dice.
- Generic names only. No branded games or programs.
- Last reviewed: October 2026. Found a mistake? Email hello@partygamebook.com.
Sources and further reading
- Centers for Disease Control and Prevention and SHAPE America (2017). Strategies for Recess in Schools (PDF).
- CDC and SHAPE America. Recess Planning in Schools: A Guide to Putting Strategies for Recess into Practice (PDF).
- CDC, Recess (overview and downloads).
- National Weather Service, Lightning safety.
- National Center on Health, Physical Activity and Disability, NCHPAD (adapted activity resources).
More free games from Party Game Book
- The Group Games LibraryIcebreakers, name games and team challenges.
- How to play classic gamesPlain rules for card, dice and pencil-and-paper games.
- Troop and den gamesField, rainy-day and quiet games for youth groups.
- Would you rather questionsKid-friendly prompts for morning meeting or a brain break.
- The Game MakerMake and print your own bingo, scrambles and trivia.
- Printing tipsGetting cards to print at the right size.
0 cards